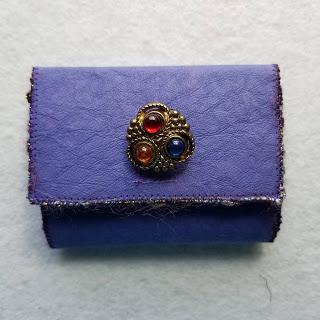
Sewing Machine Foot Caddy
October Kraft-tex Project Of The Month - Blue Iris
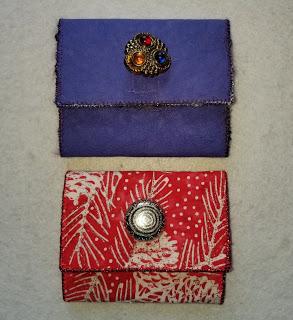
“Sew” many people joined the ranks of “Sewists” during this pandemic... And although social distancing made this a solitary endeavor many discovered a new appreciation and love of this craft. I for one have enjoyed this time of productivity but very much looking forward to the day that I can once again teach in person! It’s with upcoming class time in mind that I created this caddy that holds your specialty sewing feet. Versatile and durable Kraft-tex was the perfect material to use.
Our sewing machine is precious, add to that the specialty feet that we buy that make certain stitching possible and you have a hefty investment. Sometimes (ask me how I know this) an expensive machine foot gets lost or left behind in class. Ouch! This project is designed to make sure that your tiny machine feet made it to class and back home again.

You will need:
1 - 4 1/2” x 10” piece of Kraft-tex (I used the beautiful Blue Iris, one of my favs)
1 - 4 1/2” x 10” piece of coordinating craft felt
1 - 4 1/2” x 10” piece of inside lining fabric
2 - 4 1/2” x 10” pieces of iron on fusible (like Wonder Under)
1 - 1 ½” piece of Velcro
12” piece of coordinating ribbon for attaching “foot” (badge) holders
1 fancy embellishment to cover where you've stitched the Velcro
3 or more HORIZONTAL clear plastic badge holders (available in the office supply area)
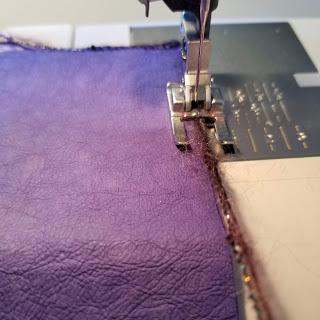
Coordinating yarn to couch around the outside of the caddy to enclose edges
Sewing machine with zig zag capabilities
Coordinating sewing thread
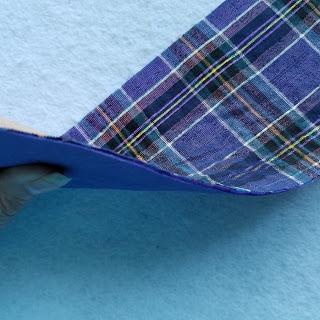
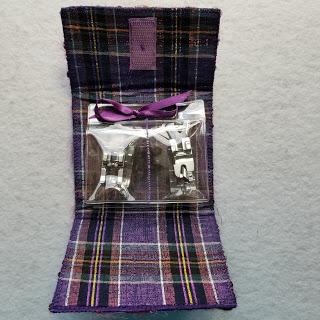
1. Fuse: Iron one piece of fusible piece on the wrong sides of the fabric and the second on the wrong side of the Kraft-tex. Then fuse each side to the craft-felt so that you create a "sandwich" with the felt is in the center.


5. Add your Velcro hook side to the inner top and loop side to the outside bottom of the caddy.
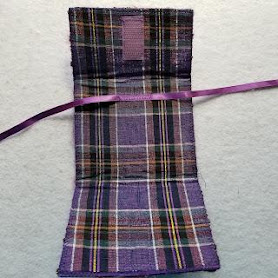

8. Thread the ribbon on to the badge holders, tie and you're ready to load up for class.
Kraft-tex can be purchased in a variety of beautiful color from CTpub.com and other participating vendors. Be sure to try this remarkable leather like product.
One for me and one for a friend... the red one has white Kraft-tex on the INSIDE of the caddy.