Monday, June 13, 2022

My art at the Ormand Memorial Art Museum reopening June 10, 2022

Four of my art works (three) in my, "Seeing Red Again" series and (one) color and value study called "Epiphany of Hexies Cubed" are on display at the Ormond Memorial Art Museum in Ormond Memorial Art Museum in Ormond Beach, Florida. I was honored to give the Artist Talk at the grand reopening of the museum on  Jun 10, 2022. 


Monday, November 22, 2021

Two of my recent works appeared in the article in the SAQA Journal.


Sunday, July 18, 2021

Published again!


My tiny little pin cushion was chosen to be published in the Summer issue of Quilting Arts Magazine. Believe it or not it all began with a bottle cap from the trash. :-) Yup, mom always said that I saw the beauty in the trash bin. 

SAQA Donation for the annual fund raising auction 202


This is my donation quilt for the SAQA 2021 fund raising auction. It measures 12" square and is called "SOL SISTERS". There is lots of hand stitching on and around the orbs. It was a fun piece but a challenge because we were traveling in our RV. 

Sunday, May 09, 2021

Precocious Pelican

Many of you know how much I love pelicans. This one I photographed this on on Ruby's Pier in Oceanside, CA a few years ago.  The piece has been combined with another photo that I took in Niantic, CT of the pilings with lobster buoys. She has been thread painted and quilted and is my submission for Martha Seilman's new bird book. I'm keeping my fingers crossed that she is chosen! This artwork called "Precocious Pelican" and measures 12" x 26".


Sunday, March 14, 2021

SQUARE CHALLENGE - Squares With A Twist Pincushion

Squares With A Twist Pin Cushion


The challenge in our SAQA Pod 4 this month was to create using the square shape. I was so taken with this challenge that I created 2 projects. The first was in my previous post, "Epiphany of Hexies" Squared. My next completed challenge piece is a pin cushion which I'm about to share the pattern with you here. At first glance from and overhead photo looks square but look closer at the second photo... Notice anything different?

You will need:

2 - 5" square cotton fabric

Stuffing filler of your choice (I used Polyester so I could really stuff my points) 

Your sewing machine, matching thread and usual sewing supplies.

Begin by ironing squares and use a bit of spray starch to give the fabric some body.


Mark the middle of the 4 of both squares by folding the squares in half both ways and make a small marks on edge of the wrong side of the fabric.


Lay the two squares RIGHT SIDES TOGETHER on a quarter twist angle. 


Match the points of the bottom to the marked half way point on the top one. Do the same with all points and half way marks. 


The next part takes a bit of patients and finessing so be take it slow. You will be sewing all the way around the edges using a 1/4" seam allowance and reduce your stitch length slightly, stitching from points of fabric to the half way marks. Because you will stitching around the corners I found it easier to give a tiny nip of the fabric at each half way mark being sure to nip LESS THAN your 1/4" seam allowance. This will allow you a bit of wiggle room to round the corner points easier. Once you have sewn all the seams you will slice a small hole on the BOTTOM FABRIC ONLY so you can turn your pincushion right side out and also provide a hole to add the stuffing.


Phew... OK now that we've stopped cursing (OK I may have said a couple naughty words but the effort was worth it LOL) Now we can turn our project right side out and add our stuffing. Start with small tuffs of fiber fill first pushing it into the points with chop stick or similar blunt tool. Completely fill the pincushion tightly compacting the filler.


 Hand stitch the hole and cover it a with a patch if you like, it's on the bottom of the project so that's optional.

And you're done!


Saturday, March 13, 2021

SAQA COLOR SEMINAR!

Recently I attended online the SAQA yearly seminar. This year the theme was color. It was an awesome experience and made me think of color in a whole new way. These are two of the pieces that I created based on the challenges that were outlined in the study. The blocks were also part of my "Square Challenge" in our local Pod.


Epiphany of Hexies Cubed

Star Dust

Friday, February 05, 2021


My fiber art quilt called, Seeing Red, was recently chosen to be in the Flagler County Art League show. It has a resin cast star fish and sand dollar as well as lots of beading and machine quilting. It measures 10" x 20" and is for sale. Message me if you are interested. 

Wednesday, December 30, 2020

Kraft-Tex Ironing Travel Mate

December 2020 Project of the month


It goes without saying that 2020 has been one “hot mess” so with that in mind I created my final 2020 Kraft-Tex project to tame the wrinkles that we have all experienced this year. Ladies and gentlemen I give you my Kraft-Tex project of the month featuring Turquoise Kraft-Tex, I’m calling it my “Kraft-Tex Ironing Travel Mate”. 


I don’t know about you but I’m itching to get back on the road and do some traveling and take and teach a few fiber art classes along the way but space and weight are always a packing consideration. This small, quick and easy project is a terrific solution that perfectly meets my needs.  


You will need:


1 - 18 ½” x 12”  piece of Turquoise Kraft-Tex

1 -    “       “    “       “     “  Cotton Batting (or Insul-Bright)

1 -    “       “   “        “     “  Silver Ironing Board Fabric

¼ Yard coordinating fabric for binding and ties

Thread to match your project binding

Plastic clips to secure the binding for sewing

Note: I also find a stiletto or awl helpful when stitching the binding on. 


Construction:

  1. Form a sandwich with Kraft-Tex (RSO) on the bottom, batting in the middle and silver ironing board fabric on the top (RSO).

  2. Clip in several places to hold the sandwich together.

  3. Create binding and tie with your coordinating fabric by cutting 3 strips, 1 ½” x width of fabric (normally 42/44”)  on the straight of grain . (Note: It is not necessary to cut on the bias because you will not be sewing any curves.)


  4. Binding and tie:

  • Create a double fold strip out of your fabric with either a bias binding tool OR: fold fabric in half wrong sides together and iron to find the center. Open the fold and fold in the raw edges to meet the ironed line. iron the folded edges. Do this on all three pieces.

  • Join two of these pieces together (end to end to form one long piece) and reiron where they are joined.

  • Set the third piece aside for now. 


  1. Completely surround and capture the edges of your sandwich in step 1 inside of the binding fold and use clips to secure in place. Be sure that your fabric sandwich edge meets the fold on the inside of the binding. 

  2. Stitch the binding in place taking care to catch both sides of it as you stitch. Miter in the corners before stitching over them. As you near the end cut binding slightly longer than the starting point as you will need to overlap the beginning and end of the binding. Finish capturing and overlapping the edge and clip in place. Finish stitching all the way around your piece.


  3. Finish the tie and attach:

  • Take your last piece of binding and give the fold one more press. Stitch the entire edge closed (the full 44” length). If you want you can turn in the ends to form a finish edge before stitching or just knot them at each end so they don’t ravel. 

  • Fold in half so when you stitch it you will have two straps. Secure the doubled tie in the middle of an end of your pressing mat and stitch the tie in place. 


  1. You can simply roll your project and secure closed with the ties 

  2. I travel with my small packable Clover Travel Iron and it wraps up perfectly inside the ironing mat.


  3. Ready? Set? Let’s GO!


Kraft-tex is an amazing leather like product that has thousands of uses. Kraft-tex is stitchable, paintable, stampable, embossable and washable to name a few. It’s been my privilege to be affiliated with C & T Publishing ( www.ctpub.com ) and part of their creative team.


Monday, November 09, 2020


Kraft-tex Koasters

November Project Of The Month Using Tangerine Kraft-tex

This is the perfect accessory for your pumpkin spice coffee mug. What’s not to love about crafty Fall projects and what better way to spruce up your coffee table than with new coasters. This project is so simple and easy you can sew up several in an hour.

What you’ll need to create each coaster:

2 - 5” squares of Kraft-tex (I used Tangerine for both the pumpkin and the bottom of project)
1 - 2 ½” square of Kraft-tex in Emerald (for the stem)
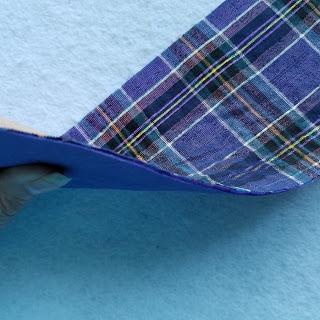
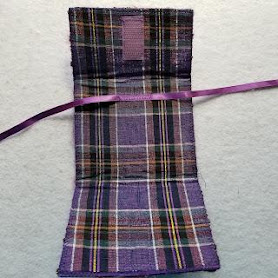
1 - 5” square of fabric for pumpkin shading (I loved auditioning fabrics for this part of the project and ended up used an orange and black plaid homespun)
1 - 5” square of vinyl for the top protective cover (I used Clear Vinyl from CTPub.com) 
2 - 5” squares of fusible web for fabric & pumpkin and 1- 2 ½’ square piece of web for the stem
Clips to hold vinyl in place for sewing.
Regular and Fine/detail scissors or Exacto knife, coordinating threads and sewing machine
Note: I found a circular cutter to be helpful to make these but not absolutely necessary. 

Directions: It always begins with a sketch for me. You are welcome to use the pattern (for personal use only) that is included here but you may want to make up your own. 

                                                                                          Enlarge or reduce pattern circle to 4" diameter.


Cut your circle pieces first (pumpkin, coaster backing, fabric, vinyl and fusible) EACH PIECE SHOULD MEASURE EQUALLY, MY PATTERN CALLS FOR A 4” DIAMETER CIRCLE, however you may want to make yours a different size. It doesn’t matter as long as you have enough of each material and each piece is cut the same size. The included pattern can be sized up or down on your printer. Also cut out your stem pattern.

NOTE: DO NOT GET A HOT IRON NEAR THE VINYL!

Fuse the web to the wrong side of the fabric then fuse together this to the wrong side of the Kraft-tex coaster bottom. Fuse the second piece to the wrong side of the pumpkin and leave the paper on before you cut it out! Also fuse the 2 1/2" green stem piece. 

Carve the pumpkin and fuse. Lightly trace with pencil the pumpkin pattern to the right side of the Kraft-tex then cut out using scissors or an Exacto knife. Peel away the fusible protective paper and fuse to the fabric side of the coaster.

Cut and Fuse Stem. Lightly trace the stem pattern to the right side of the green stem then cut our and fuse in place, being sure to keep it inside the pumpkin circle so it will be covered by the vinyl.

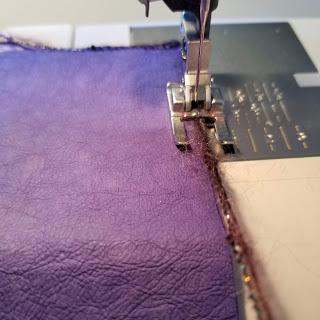
Add Vinyl and and Stitch by clamping in several places and stitching slowly around the entire perimeter of the coaster. A Teflon foot is helpful but not necessary.  


Optional stitching: You may wish to stitch down the Kraft-tex around the pumpkin and stem shapes, after fusing but before adding the vinyl, to simplify this pattern I’ve only shown it fused.

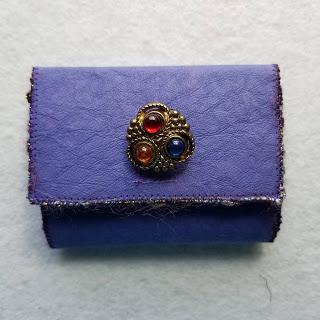
Kraft-tex is a colorful and versatile leather like product and may be purchased at ctpub.com or other participating dealers.

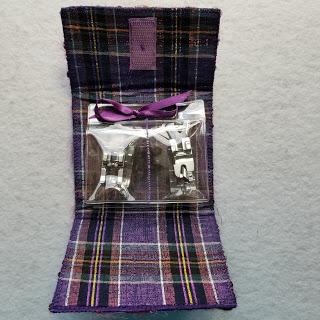
Playing with plaids! Can you tell that I have quite a collection? And these are just a few ! :-) 


And the winning plaid is... ready for a coffee cup!


Sunday, October 25, 2020


Sewing Machine Foot Caddy

October Kraft-tex Project Of The Month - Blue Iris


“Sew” many people joined the ranks of “Sewists” during this pandemic... And although social distancing made this a solitary endeavor many discovered a new appreciation and love of this craft. I for one have enjoyed this time of productivity but very much looking forward to the day that I can once again teach in person! It’s with upcoming class time in mind that I created this caddy that holds your specialty sewing feet. Versatile and durable  Kraft-tex was the perfect material to use.


Our sewing machine is precious, add to that the specialty feet that we buy that make certain stitching possible and you have a hefty investment. Sometimes (ask me how I know this) an expensive machine foot gets lost or left behind in class. Ouch! This project is designed to make sure that your tiny machine feet made it to class and back home again.


You will need: 

  • 1 - 4 1/2” x 10” piece of Kraft-tex (I used the beautiful Blue Iris, one of my favs)

  • 1 - 4 1/2” x 10” piece of coordinating craft felt

  • 1 - 4 1/2” x 10” piece of inside lining fabric

  • 2 - 4 1/2” x 10” pieces of iron on fusible (like Wonder Under)

  • 1 - 1 ½” piece of Velcro

  • 12” piece of coordinating ribbon for attaching “foot” (badge) holders

  • 1 fancy embellishment to cover where you've stitched the Velcro

  • 3 or more HORIZONTAL clear plastic badge holders (available in the office supply area)

  • Coordinating yarn to couch around the outside of the caddy to enclose edges

  • Sewing machine with zig zag capabilities

  • Coordinating sewing thread


Construction:

1. Fuse: Iron one piece of fusible piece on the  wrong sides of the fabric and the second on the wrong side of the Kraft-tex. Then fuse each side to the craft-felt so that you create a "sandwich" with the felt is in the center.


2. Create creases by placing the lining side up on the table and folding up 3 ½” from bottom and down 2 ½” from top creating a tri-fold.


3. Open (Kraft-tex side up) and couch (with a zig zag stitch) yarn all the way around the perimeter of the caddy.


4. Add ribbon tie to the inside of your caddy. Determine placement by placing a badge holder inside the caddy making a beginning and ending mark for stitching so the ribbon goes through holes in the badge holder.


5. Add your Velcro hook side to the inner top and loop side to the outside bottom of the caddy.


6.Add your button or embellishment to the front top cover to conceal the Velcro stitching.


7. Stitch your acetate badge holders down the middle center so it can hold 2 normal size feet or leave without stitching to accommodate a larger specialty foot. If it helps you can create a label to tuck inside the individual feet compartments. 

8. Thread the ribbon on to the badge holders, tie and you're ready to load up for class.


Kraft-tex can be purchased in a variety of beautiful color from CTpub.com and other participating vendors. Be sure to try this remarkable leather like product.

One for me and one for a friend... the red one has white Kraft-tex on the INSIDE of the caddy.